

Sharing is caring!
Table of Contents
Easy 3 Ingredient Biscuit Recipe
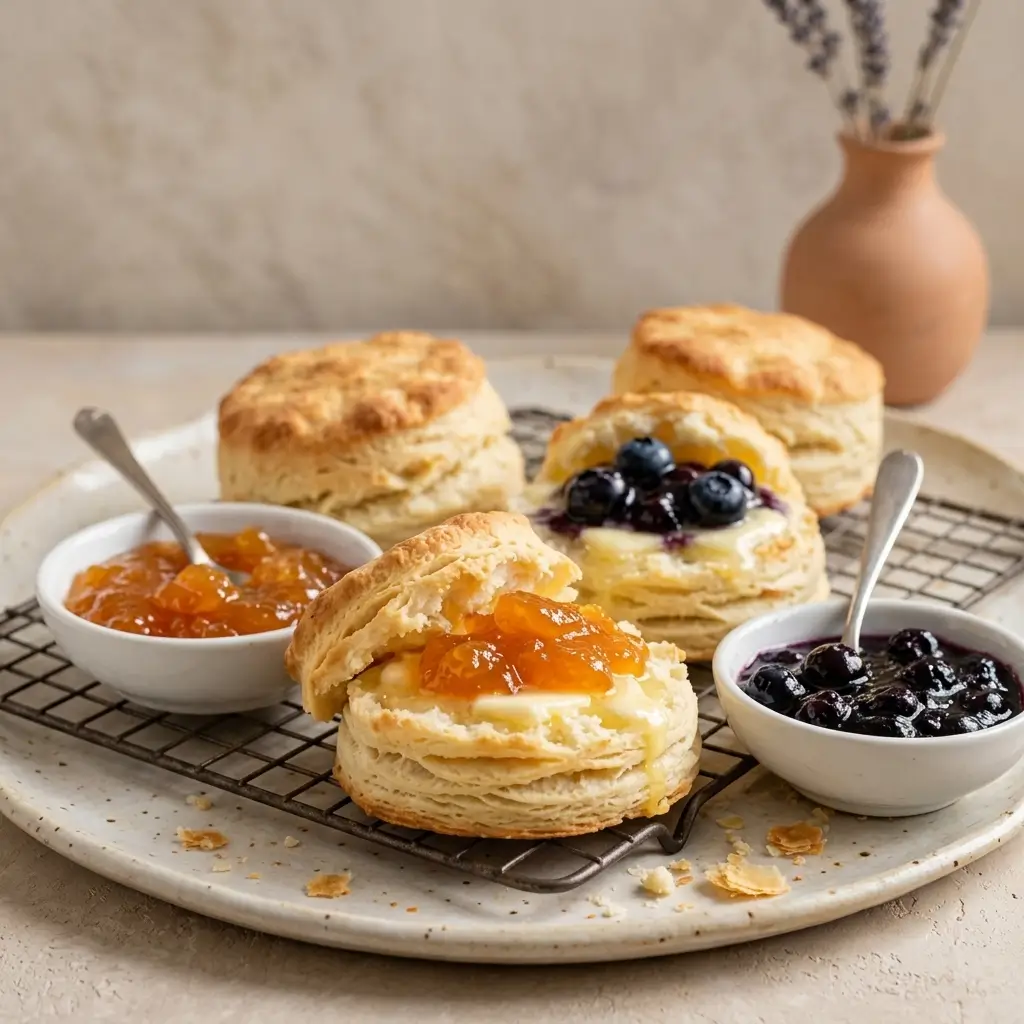
There’s a certain kind of quiet that settles in just after the sun comes up. The world outside is still soft at the edges, and in the kitchen, the only sound is the gentle hum of the refrigerator. It’s in these moments that a specific craving whispers to me. It’s not for anything complicated. It’s for the warm, flaky, buttery embrace of a homemade biscuit, still hot enough to melt a pat of butter on contact.
I used to think that kind of magic required a grandmother’s touch, a cold marble slab, and a dozen ingredients. But then I found this recipe. Or maybe it found me. It’s the recipe for when you haven’t been to the store, when the day feels like it’s already moving too fast, and you need to anchor it with something simple and good. It’s just three ingredients. Three! It feels like a secret handshake, a little kitchen cheat code I’m so thrilled to share with you.
Why This Recipe is a Kitchen Hug
This isn’t just a recipe; it’s a feeling. It’s the antidote to the notion that baking has to be precise and perfect to be worthwhile. There’s something deeply satisfying about getting your hands in the flour, feeling the cold butter crumble between your fingers, and knowing that in less than 15 minutes, your home will smell like a bakery. It’s a small act of rebellion against a complicated world, and the payoff is a basket of golden, steamy biscuits. No fancy tools, no stress—just a bowl and a little bit of heart.
Meet Your New Best Friends: The Three Ingredients
Let’s get acquainted with the team. They’re probably already in your kitchen, just waiting for their moment to shine.
- Self-Rising Flour: The overachiever of the group. It’s just flour that already has baking powder and salt mixed right in. It’s the reason we can skip the measuring spoons and get straight to the good part. It’s our built-in rise, our little bit of lift. Don’t have any? Don’t you worry. I’ve got a fix for you down below.
- Cold Butter: The secret keeper. This is where the flaky, pull-apart layers come from. Those little pea-sized chunks of cold butter will melt in the oven’s heat, creating tiny pockets of steam that push the layers apart. I always grab my butter straight from the fridge and sometimes even give it a 10-minute chill in the freezer while I get everything else ready. Cold butter is happy butter.
- Milk: The peacemaker. It’s what brings everyone together into a soft, shaggy dough. Whole milk is my go-to for its richness, but this is a forgiving recipe. Buttermilk will make them tangy and tender, and heavy cream will make them outrageously decadent. Use what you’ve got.

Let’s Bake Together: The Method with Heart
This is less of a instruction manual and more of a gentle guide. Put on some music. Pour yourself a coffee. Let’s bake.
- Preheat your oven to a toasty 450°F (230°C). This blast of heat is what gives our biscuits their gorgeous rise and golden tops. Line a baking sheet with a piece of parchment paper—my favorite trick for easy cleanup.
- Time to get tactile. In a big bowl, measure out 2 cups of self-rising flour. Take ½ cup (1 stick) of that very cold butter and cut it into small cubes. Toss them into the flour. Now, using a pastry cutter, two knives, or my personal favorite method—your clean fingertips—work the butter into the flour. You’re not looking for a fine powder; you want a mix that looks like coarse sand with lovely little butter pebbles throughout. This is the foundation of flakiness.
- The gentle pour. Make a little well in the center of your flour-butter mixture and pour in ¾ cup of cold milk. Take a fork and gently stir it around. The goal is to just combine it. The dough will look a bit rough and shaggy, with a few dry bits at the bottom of the bowl. This is perfect. Over-mixing is the only thing that can make these biscuits tough. We’re going for a gentle gathering, not a rigorous workout.
- The tender touch. Dump the dough onto a lightly floured surface. Gently pat it—don’t aggressively roll it—into a circle about ½-inch thick. I like a thick biscuit, personally. Flour the rim of a glass or a biscuit cutter and press straight down into the dough. Don’t twist! Just a clean press down and lift up. Twisting seals the edges and hinders their climb to greatness.
- Into the heat they go. Place your biscuits on the prepared sheet. I like to crowd them a little bit so they rise up and not just out. They’ll support each other. Bake for 10-12 minutes. You’ll know they’re done when your entire home smells like heaven and the tops are touched with gold.
- The final act of love. The minute they come out of the oven, I take a stick of butter and gently rub it across the tops of the biscuits. It sizzles and melts, creating this gorgeous, glistening, flavorful finish. It’s non-negotiable in my house. It’s the difference between a good biscuit and a great one.
Little Extras from My Kitchen to Yours
· My daughter loves it when I add a handful of shredded cheddar cheese and a pinch of smoked paprika to the flour. We call them “Orange Smiles.”
· The ultimate comfort move: splitting a warm biscuit, drizzling it with honey, and adding a sprinkle of flaky sea salt.
· If by some miracle you have leftovers, they live in a bread bag on the counter. The next day, we split them, toast them lightly, and slather them with jam. They make the best impromptu strawberry shortcakes, too.
· My favorite trick? I almost always double the batch. Before baking, I freeze the extra biscuits on a sheet pan and then toss them in a freezer bag. Then, on a busy morning, I can pop two frozen biscuits straight into the oven. It’s like having a warm hug on standby.
How We Eat Them
The beauty of a warm biscuit is its versatility. They’ve been the foundation of sleepy Saturday breakfast sandwiches in our house, cradling scrambled eggs and a slice of sharp cheddar. They’ve been dunked into hearty soups on chilly evenings. But most often, they’re eaten standing up, over the kitchen sink, while the butter drips down our wrists. That’s the true sign of a successful biscuit.
Your Biscuit Questions, Answered
Q: I’m out of self-rising flour! Panic? A:Absolutely no panic needed. For this recipe, whisk together 2 cups of all-purpose flour + 3 teaspoons of baking powder + ½ teaspoon of salt. Voilà! You’re back in business.
Q: Do I really need to keep the butter so cold? A:I promise, it’s the one thing worth being fussy about. Cold butter = steam = flaky layers. It’s science, and it’s delicious.
Q: Can I use buttermilk? A:Please do! It adds a wonderful tang and makes the crumb incredibly tender. It’s my favorite swap.
Parting Thoughts
This little recipe is more than just a list of ingredients. It’s a reminder that the most satisfying things are often the simplest. It’s about the feeling of flour on your hands and the smell of something baking that tells everyone in the house that they are loved. It’s a small, warm victory. I hope you make them, and I hope you feel that, too.
I’d love to hear from you. What’s your favorite way to enjoy a warm biscuit? Tell me in the comments below
recipes to try
- Quick & Creamy Overnight Oats with Almond Milk (No Cooking!)
- Sourdough Bread Recipe for Beginners
- Healthy Avocado and Egg Toast Recipe – Quick Energy Breakfast
- Breakfast Sausage Casserole Recipe

3-Ingredient Biscuits: Simple, Flaky, and Full of Love
Course: BreakfastCuisine: Side Dish, Breakfast, SnackDifficulty: Easy8
biscuits5
minutes12
minutes200
kcal17
minutesThe easiest, flakiest biscuits you’ll ever make with just self-rising flour, butter, and milk. Perfect for a quick and comforting breakfast.
Ingredients
2 cups self-rising flour (plus more for dusting)
· 1/2 cup (1 stick) cold unsalted butter, cubed
· 3/4 cup cold whole milk
· 1 tbsp melted butter (for brushing, optional)
Directions
- Preheat oven to 450°F (230°C). Line a baking sheet with parchment paper.
- In a large bowl, combine the self-rising flour and cold, cubed butter. Use a pastry cutter, two forks, or your fingers to work the butter into the flour until the mixture resembles coarse crumbs with pea-sized bits of butter.
- Pour in the cold milk. Stir gently with a fork until just combined and a shaggy dough forms. Do not overmix.
- Turn the dough out onto a lightly floured surface. Gently pat it into a ½-inch thick circle.
- Use a floured 2.5-inch round biscuit cutter or glass to cut out biscuits. Press straight down without twisting.
- Place biscuits close together on the prepared baking sheet. Bake for 10-12 minutes, or until golden brown on top.
- Remove from oven and immediately brush the tops with melted butter, if desired. Serve warm.
Notes
- Keep it Cold: The key to flaky layers is using cold butter and milk. Don’t let the dough get warm.
- Don’t Overmix: Mix the dough only until it comes together. Overworking it leads to tough biscuits.
- No Self-Rising Flour? Make your own by whisking together 2 cups all-purpose flour, 3 tsp baking powder, and ½ tsp salt.
- Freezing: Freeze unbaked biscuit shapes on a pan, then transfer to a bag. Bake from frozen, adding 2-3 extra minutes.





Leave a Reply