

Sharing is caring!
Table of Contents
Let’s be honest. The Thanksgiving turkey can be terrifying. It’s the centerpiece. The main event. The thing that can feel like a dry, bland, culinary final exam. For years, I approached turkey day with a pit in my stomach. Would it be juicy? Would it be flavorful? Or would it be the year of the dreaded “turkey sawdust”?
After one too many close calls, I became a woman on a mission. I tested, I tweaked, I brined for days, and I basted until my arm was sore. And through all that, I discovered a beautiful truth: the juiciest, most flavorful roast turkey doesn’t need to be complicated.
This recipe is my gift to you. It’s the culmination of all those trials, stripped down to the most effective, foolproof method. No lengthy brining required. No constant oven-peeking. Just one powerful secret: a flavored butter massaged under the skin, and a simple foil shield. That’s it.
This is the turkey that will make your guests’ eyes widen. The one they’ll talk about next year. It’s the turkey that finally made me relax and enjoy Thanksgiving. Let me show you how.
Why This Turkey is a Game-Changer
- The Juiciest Breast Imaginable: By massaging herbed butter directly under the skin, we’re basting the breast from the inside out as it cooks. The foil shield then protects it from over-browning, ensuring every slice is moist and tender.
- Crispy, Salty, Irresistible Skin: Rubbing the outside with butter and oil and seasoning it generously gives you that perfect, crackling-crisp skin that everyone fights over.
- Flavor in Every Single Bite: The butter isn’t just for moisture; it’s packed with lemon, garlic, and parsley that infuse the entire bird. The aromatics stuffed in the cavity steam from the inside, adding another layer of depth.
- Surprisingly Simple & Stress-Free: This method is designed for success, not stress. The high-then-low oven temp and the built-in resting time are your best friends, ensuring a perfectly cooked bird that’s ready when you are.
A Guide to Your Turkey Team: The Ingredients
Think of these not as a list, but as your support crew for the big day.
- The Star: The Turkey (12 lbs). A 11-15 lb bird is the sweet spot for even cooking. The most important step? Thawing it completely in the fridge (allow 3 days for a 12-pounder!). A frozen center is your number one enemy.
- The Secret Weapon: Flavored Butter. This is the heart and soul of the recipe.
- Butter & Olive Oil: The fat that carries flavor and creates that gorgeous, crispy skin.
- Lemon Juice & Zest: The bright, fresh acidity that cuts through the richness and keeps the meat tasting light.
- Garlic & Parsley: The classic, aromatic duo that makes the entire bird smell and taste incredible.
- Salt & Pepper: The essential seasonings that make all the other flavors pop.
- The Aromatic Boost: Cavity Stuffing.
- Onion, Garlic, Parsley, Lemon: We’re not making eating stuffing here; we’re creating a natural steam pouch that perfumes the turkey from the inside with a subtle, herby citrus note.
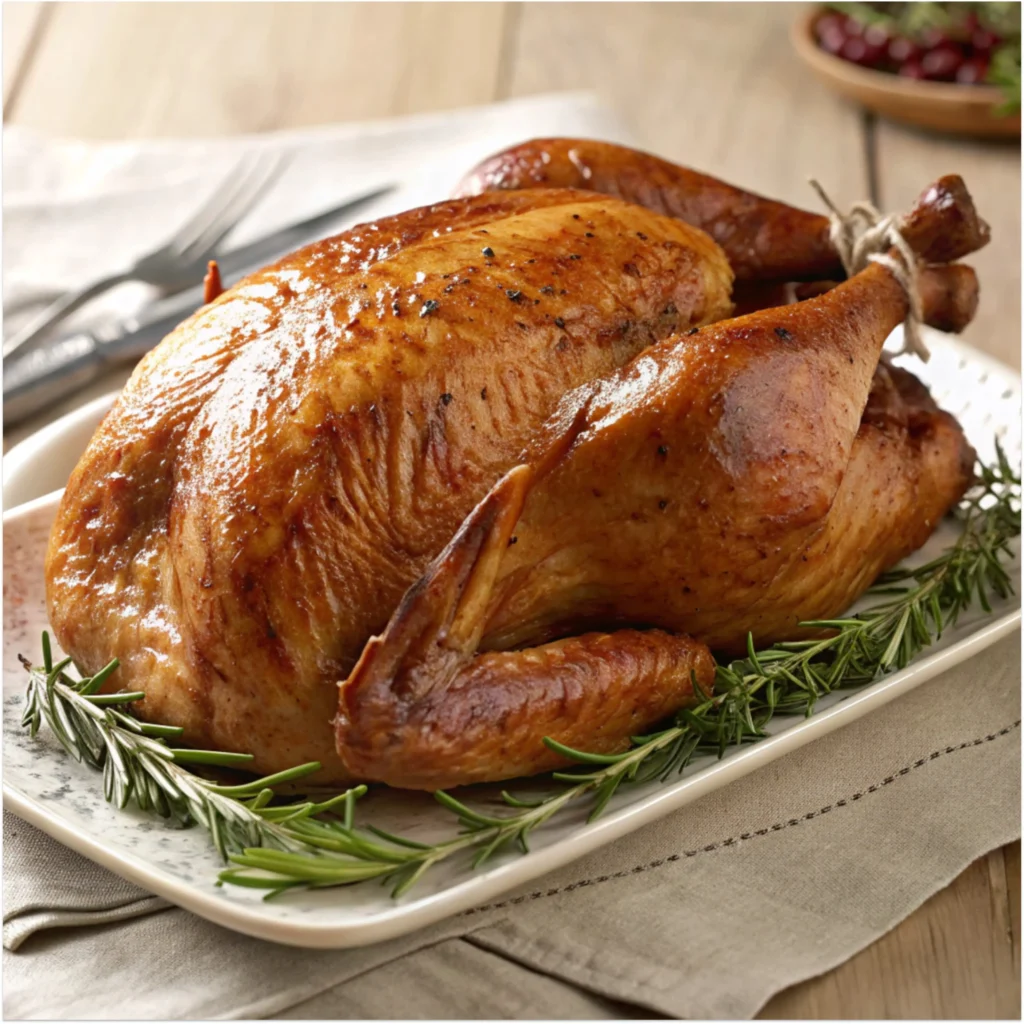
The Roadmap to a Perfect Turkey: A Step-by-Step Guide
Take a deep breath. We’re going to do this together, and it’s going to be amazing.
Part 1: Prepping Your Turkey (The Foundation)
- Temperature is Key: Take your thawed turkey out of the fridge 30 minutes before you start. A cooler bird going into a hot oven cooks more evenly.
- Dry the Skin: Pat the turkey very dry inside and out with paper towels. This is non-negotiable for crispy skin! Moisture is the enemy of crispness.
- Prep the Pan: Place the turkey in your roasting pan. Tuck the wing tips behind the bird’s back. This keeps them from burning and makes for a prettier presentation.
Part 2: Seasoning, Stuffing, and Tying (The Flavor Infusion)
- Season the Cavity: Generously season the inside of the turkey with salt and pepper. This is your first layer of seasoning.
- Create the Magic Butter: In a bowl (a food processor makes it easy to combine the lemon juice), mix all the flavored butter ingredients until well combined.
- The Most Important Step: Gently separate the skin from the turkey breast by sliding your fingers underneath it. Be careful not to tear it. Take about two-thirds of your flavored butter and spread it directly over the breast meat, under the skin. Massage the skin from the outside to spread it evenly. This is what makes the breast impossibly juicy.
- Butter and Season the Outside: Rub the remaining butter all over the outside of the bird—legs, wings, everything. Drizzle with a little more olive oil and then generously season the outside with salt and pepper. Don’t be shy! This creates the perfect, salty, crispy skin.
- Stuff and Truss: Stuff the cavity with your quartered onion, garlic, parsley, and lemon. Use kitchen twine to tie the legs together. This helps the bird cook evenly and looks beautiful.
Part 3: How to Roast (The Foolproof Method)
- Oven Setup: Preheat your oven to 430°F and place a rack in the lower third of the oven. This high heat starts the browning process.
- Create a Foil Shield: Tear off a large piece of foil and fold it into a triangle. Rub one side with oil and mold it over the breast, then set it aside. You’ll use this later to protect the white meat from drying out.
- The Initial Roast: Place the turkey in the oven and roast at 430°F for 20 minutes. This gives the skin a great head start on browning.
- Baste and Shield: Carefully remove the turkey. Quickly baste it with the pan juices. Now, place your pre-shaped foil triangle over the breast.
- The Main Roast: Reduce the oven temperature to 350°F. Continue roasting. For a 12 lb bird, this will take about 2 hours and 30 minutes more (roughly 13 minutes per pound). The turkey is done when a meat thermometer inserted into the thickest part of the thigh reads 170°F and the breast reads 160°F.
- THE REST: This is critical. Transfer the turkey to a platter, tent it loosely with foil, and let it rest for at least 1 hour. This allows the juices to redistribute throughout the meat, resulting in a moister, more tender turkey. The temperature will continue to rise to a safe 165°F in the breast. Use this time to make your gravy and other sides!
Juicy Roast Turkey
| Prep Time | Cook Time | Total Time | Servings |
|---|---|---|---|
| 30 minutes | 2 hrs 50 min | 3 hrs 20 min | 12 people |
Pro-Tips for Turkey Success
- Thawing is Everything: A frozen-solid turkey will cook unevenly. Thaw it in the fridge, allowing 24 hours for every 4-5 pounds.
- Dry Skin = Crispy Skin: Do not skip the step of patting the turkey completely dry.
- Trust the Thermometer, Not the Clock: Ovens vary. A reliable meat thermometer is your most important tool. The turkey is done when the thigh is 170°F and the breast is 160°F.
- Don’t Skip the Rest! Rushing to carve a turkey releases all the precious juices you worked so hard to create. Let it rest for a full hour—it will still be warm.
Your Turkey Troubles, Solved!
Q: Can I make the flavored butter ahead of time?
A: Absolutely! Make it up to 2 days ahead, cover, and keep it in the fridge. Let it soften at room temperature before using.
Q: I’m scared of putting butter under the skin. Any tips?
A: Start at the top of the breast cavity. Gently work your fingers between the skin and the meat, loosening it. It’s sturdier than you think! Just use your fingertips and be slow and gentle.
Q: What if I don’t have kitchen twine?
A: You can tuck the legs into the skin flap at the tail end, or simply leave them untied. Trussing helps with even cooking, but it’s not a total deal-breaker.
Q: How do I get that beautiful golden-brown color?
A: The initial high-temperature blast is key. Also, ensuring the skin is dry and well-buttered before going into the oven will promote beautiful browning.
There you have it. The path to a glorious, juicy, show-stopping turkey is clear. You have the plan, you have the secrets, and now you have the confidence. Go forth and roast the best turkey of your life. Happy Thanksgiving

The Only Juicy Roast Turkey Recipe You’ll Ever Need
Course: Main CourseCuisine: AmericanDifficulty: Intermediate12
servings30
minutes2
hours50
minutes556
kcal3
hours20
minutesMake the juiciest roast turkey with crispy skin! Our easy, foolproof recipe uses a secret herbed butter for a flavorful, moist Thanksgiving centerpiece.
Ingredients
For the Turkey:
12 lb turkey, thawed
Salt and freshly ground black pepper
For the Flavored Butter:
1 cup (2 sticks) unsalted butter, softened
2 Tbsp olive oil (not extra virgin)
4 Tbsp fresh lemon juice (from 1 large lemon)
1/2 Tbsp lemon zest
3 large garlic cloves, pressed or minced
1/4 cup freshly chopped parsley
1/2 Tbsp sea salt
1/2 tsp black pepper
For the Aromatics:
1 large onion, quartered
4 garlic cloves, halved
1/2 bunch fresh parsley
1 lemon, quartered
Directions
- Prep Turkey: Take turkey out of fridge 30 mins before cooking. Pat completely dry inside and out. Tuck wings under.
- Make Butter: Combine all flavored butter ingredients in a bowl until smooth.
- Season: Season inside of cavity with salt and pepper. Gently separate the skin from the breast and spread 2/3 of the butter underneath. Rub the rest all over the outside. Drizzle with oil and season the skin generously with salt and pepper.
- Stuff & Truss: Fill cavity with onion, garlic, parsley, and lemon. Tie legs together with kitchen twine.
- Initial Roast: Preheat oven to 430°F. Roast turkey for 20 minutes.
- Shield & Finish: Remove turkey, baste, and place an oiled foil shield over the breast. Reduce oven to 350°F and roast until thigh registers 170°F and breast registers 160°F (about 13 mins per pound).
- Rest: Let the turkey rest, loosely tented with foil, for at least 1 hour before carving
Notes
- Thawing is Everything: A frozen-solid turkey will cook unevenly. Thaw it in the fridge, allowing 24 hours for every 4-5 pounds.
- Dry Skin = Crispy Skin: Do not skip the step of patting the turkey completely dry.
- Trust the Thermometer, Not the Clock: Ovens vary. A reliable meat thermometer is your most important tool. The turkey is done when the thigh is 170°F and the breast is 160°F.
- Don’t Skip the Rest! Rushing to carve a turkey releases all the precious juices you worked so hard to create. Let it rest for a full hour—it will still be warm.

Leave a Reply